More than 2,600 boat owners have sought help online for fuel gage issues, making correct fuel gage wiring a widespread challenge in the boating community.
Faulty fuel gage wiring can create uncertainty about your boat’s fuel levels. The problems range from gages stuck on “FULL” to complications with dual fuel tanks and grounding issues. Improper wiring and grounding remain the most common culprits behind fuel gage malfunctions in boats.
This complete guide to boat fuel gage wiring will help you master the process. You’ll understand everything from simple components to installation techniques. Your boat’s fuel gage will provide accurate readings when you follow these steps and maintain a structured approach. This ensures safer and more confident boating adventures.
The next section explains the simple steps and components needed to begin the process.
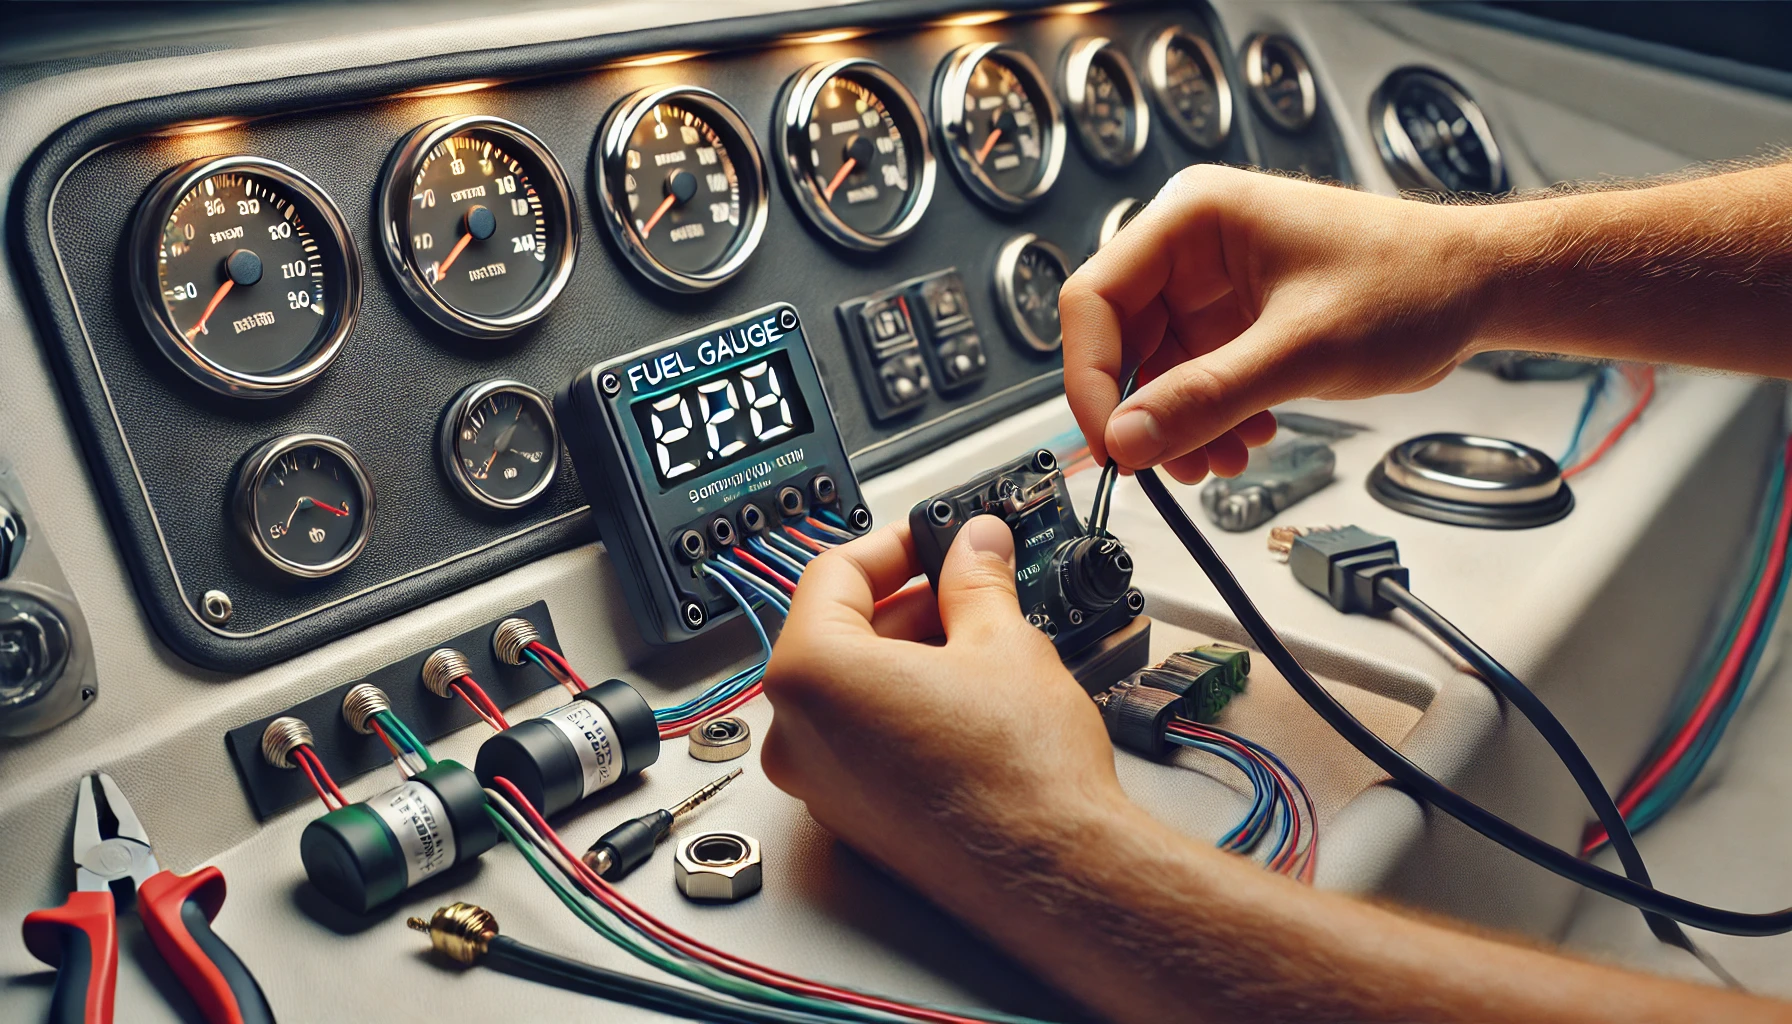
Understanding Boat Fuel Gage Components
A boat’s fuel gage system has three main components that work together to show accurate fuel levels. Learning about these components will help you install the wiring correctly.
Simple Parts Overview
The fuel gage system needs three key elements to monitor fuel levels accurately. The fuel gage sits on your boat’s dashboard and shows current fuel levels. The system has a sender unit inside the fuel tank that measures fuel levels. The wiring and connections tie these components to your boat’s 12-volt battery system.
Types of Marine Fuel Gages
You’ll find two main types of marine fuel gages: analog and digital. Analog gages show readings with a traditional needle, while digital gages give you more advanced features. Digital versions provide precise readings and can show multiple data points at once, like engine output and fluid levels. These digital models also come with back-lighting so you can see them better at night.
Digital gages last longer because they have fewer moving parts than analog models. This makes them less likely to fail in harsh marine conditions. Quality marine gages come with IP67 protection ratings, which protect them from water up to 1 meter deep for 30 minutes.
Sender Unit Explained
The sender unit measures fuel levels and turns them into electrical signals the gage can read. Most modern boats use one of three sender types:
- Float-arm senders
- Column-type senders
- Ultrasonic senders
Float-arm senders are common in recreational boats and work with a straightforward mechanism. A float attached to a metal arm moves up and down with the fuel level. This movement creates electrical resistance changes that the gage uses to show fuel levels.
The sender unit works like a variable resistor, with resistance values between:
- 0-90 ohms when the tank is full
- 240 ohms when the tank is empty
The sender needs proper grounding to the boat’s battery to work right. It connects to the gage with two main wires: a black wire for grounding and a pink wire for signals, following American Boat and Yacht Council standards.
Ultrasonic senders use the latest technology with sound waves to measure fuel levels. Tests show these units give the most accurate and reliable readings of all sender types.
Your gage and sender unit must be compatible. American and European style senders work differently, and mixing them leads to wrong readings. The sender unit’s position is vital – it usually sits near the fuel pickup fitting, about 1 inch above the tank’s bottom.
The system’s accuracy depends on regular sender unit maintenance. You should check the sender’s movement every second season to make sure it moves smoothly without any contamination that could affect how it works.
Essential Tools and Safety Precautions
Safety measures and the right tools will make all the difference when you wire a boat’s fuel gage. Let me outline the equipment and safety protocols you need for a successful installation.
Required Tools List
You’ll need these specific tools to wire your fuel gage:
- Basic hand tools:
- Tape measure
- Phillips head screwdriver
- Torque wrench
- Hacksaw
- Electrical equipment:
- Multimeter (for resistance testing)
- Crimping-style connectors with heat-sealing covers
- Heat gun
- Liquid Electrical Tape or waterproofer
- Safety equipment:
- Fire extinguisher (within reach)
- Oil absorbent pads
- Dielectric grease
Safety Measures
Safety is the life-blood of any fuel system work. You need to follow these vital precautions:
Power Management Shut off the main battery switch to stop current flow through the wiring system. Turn off all electrical equipment, including fans and accessories that could create sparks.
Fuel System Preparation Empty the fuel tank and clear all fumes before you start the installation. Gas vapors can still linger because they’re heavier than air and move quickly into enclosed spaces.
Workspace Safety The tank area must stay completely free from sparks and flames. Hand tools are your only option because power tools can ignite fuel vapors.
Connection Protection Protect your electrical connections this way:
- Use only crimping-style connectors with heat-sealing covers
- Seal connections using a heat gun or waterproofer
- Add dielectric grease to stop moisture problems
Essential Inspection Steps Before you start working:
- Look at all fuel lines and connections
- Check fuel vents
- Look through bilges and closed compartments for vapors
- Do the “sniff test” – the quickest way to detect fuel leaks
Wire Protection Methods Protect your wires by:
- Keeping them away from moving parts
- Running cables clear of hot surfaces
- Using only A-rated hoses inside engine compartments (B-rated hoses aren’t fire-rated)
Emergency Preparedness Keep emergency contacts close by. Federal law requires you to report any fuel spills that leave a sheen on the water to the U.S. Coast Guard at 1-800-424-8802.
Professional Assistance Get professional help right away if you’re unsure about any steps. This piece gives you detailed instructions, but your safety comes first when tasks seem unfamiliar.
Environmental Considerations Keep our marine environment safe:
- Don’t use detergents on fuel spills
- Keep oil-absorbent materials ready
- Document the whole ordeal if anything happens
These safety protocols and tools will create a secure environment to wire your boat’s fuel gage. Note that these aren’t just guidelines – they’re vital steps that protect you and your vessel during installation.
Preparing Your Boat’s Fuel System
A well-prepared boat fuel system is the foundation for accurate fuel gage wiring. Your installation will be reliable and marine-ready with proper inspection and access procedures.
Accessing the Fuel Tank
You’ll need to locate and access your boat’s fuel tank components first. Most boats come with access plates that lead to key parts. Boats typically have two round access plates:
- One near the captain’s chair (accessing fill hose and vapor exhaust)
- One towards the stern (accessing fuel sender unit and drain hose)
The gas tank deck panel removal gives the best access. This process needs:
- Removing nine Phillips screws securing the panel
- Disconnecting the drain hose
- Carefully lifting the panel
The exposed tank needs inspection for:
- Leaks or cracks
- Loose mountings
- White powder on aluminum tanks that indicates corrosion
- Proper tank suspension above the boat floor
Important: The tank should sit slightly above the boat’s floor or rest on non-absorbent rubber mounting cushion pads. This prevents moisture buildup and makes the tank last longer.
Checking Existing Wiring
The DC electrical pathways connecting the fuel sender unit to both the gage and 12-volt battery need inspection. These parts are constantly exposed to:
- Damp air
- Continuous vibration
- Salt corrosion (in coastal environments)
Start your wiring check by confirming:
- The sender unit’s center post connection
- Ground wire integrity
- Push-on connection cleanliness
American Boat and Yacht Council standards specify:
- Black wire for ground
- Pink wire for the sender signal
Critical Inspection Points:
- Look for damaged or corroded wires between the sender unit and gage
- Check all connection points for security
- Clean push-on connections using fine emery paper
- Verify proper waterproofing of existing connections
The sender unit mounting needs inspection and typically has:
- Five mounting screws (5/16-inch size)
- One center wire connection
- Two ground/negative wires secured by a sixth screw
Ground connections are crucial for accurate readings. Use a multimeter set to ohms and:
- Test for ‘no resistance’ between sender ground and battery ground
- Verify proper ground at the sender unit
Waterproofing Requirements: New connections should always use:
- Crimping-style connectors with heat-sealing covers
- Heat gun for proper sealing
- Liquid Electrical Tape for additional protection
Wire protection goes beyond connections. Route all wires:
- Away from moving parts
- Clear of hot surfaces
- Through appropriate conduits or protective sleeves
The tank’s inspection ports need a final check. Quality installations have:
- Ports large enough for maintenance access
- Multiple ports if the tank has baffles
- Removable pickup tubes for cleaning
A well-prepared fuel system and properly checked wiring are great ways to get reliable fuel gage readings. Your attention to detail now will prevent future problems and keep your fuel readings accurate during your time on the water.
Installing the Fuel Sender Unit
A fuel sender unit replacement needs precision and careful attention. You’ll get accurate fuel readings and avoid leaks by doing this and being systematic.
Removing Old Sender
Clean the area around the existing sender unit first. Take out the five mounting screws with a 5/16-inch hex head screwdriver in a star pattern. Put a clean rag in the tank opening so debris doesn’t fall inside.
Critical Steps:
- Disconnect all power sources
- Note the orientation of the current float arm
- Mark the lead hole position (opposite to the sender wire)
- Remove mounting screws carefully
Mounting New Unit
Start the installation by positioning the new sender unit correctly. Measure the depth from the top of the sending unit to the tank bottom. This measurement helps you select the right float arm length for your tank.
Reed-type sending units are more accurate than float-style units. Float-style units might show empty with fuel still present, or stay full longer than actual levels. But both types work well with proper installation.
Float Arm Adjustments:
- Position the float arm in 90-degree increments
- Make sure it doesn’t touch tank walls
- Check for free movement across its range
- Keep proper clearance from tank bottom
The new unit needs careful placement. The five-hole mounting pattern fits only one way – it’s not symmetrical. The lead hole on the tank must match with the hole on the sending unit, opposite to where the electrical wire exits.
Proper Gasket Installation
The gasket stops fuel leaks when installed right. Slide it over the float arm so it sits flat against the mounting plate’s underside.
Installation Sequence:
- Position gasket precisely
- Line up screw holes carefully
- Insert float arm through tank opening
- Place mounting screws with gasketed washers
Use a star pattern to tighten mounting screws until white sealant shows under screw heads. Too much tightening can damage the seal and reduce the gasket’s life. Your unit might come with two screw sets (#10-32 and #10-24) – pick the right size.
Leak Testing Protocol: Test for pressure after installation:
- Pressurize tank to 3 PSI
- Apply soapy water around seal
- Look for bubbles that indicate leaks
- Retighten screws if needed
Fuel-resistant sealants can improve sealing in some installations. Cork gaskets with the right sealer work reliably. Rubber gaskets often have built-in staples that make better ground connections between the tank and sender unit.
Common Installation Errors:
- Wrong float arm orientation
- Misaligned mounting holes
- Over-compressed gaskets
- Wrong screw tightening sequence
Your new fuel sender unit will give reliable readings throughout its life with proper alignment and correct installation steps. Good fuel level monitoring depends on correct sender unit installation and solid ground connections.
Connecting Power Supply
A reliable power connection is the foundation of any boat fuel gage system that works properly. Your fuel readings will be accurate when you pay attention to power sources and grounding to create a dependable electrical pathway.
Finding 12V Source
The fuel gage needs a steady 12-volt power supply that turns on with the ignition switch. Most boats have a daisy-chain setup for gage power where multiple gages share one power source through the ignition wiring.
Power Source Options:
- Direct battery connection with a dedicated switch
- Ignition switch circuit
- Accessory switch on the dashboard
- Existing gage power circuit
The best performance comes from a switched positive connection that:
- Gives steady 12-volt power
- Works only when the ignition is on
- Can handle multiple gage connections
- Has proper circuit protection
Voltage Testing Protocol:
- Use a multimeter to verify proper voltage at:
- Battery terminals
- Starter solenoid
- Gage power terminals
- Check for voltage drops between:
- Battery and starter
- Starter and solenoid
- Power source and gage
Modern marine systems often use yellow wires to carry key-on power with multiple Y-splitters and bullet connectors for accessories. You should check all fuses in both:
- Engine harness
- Main boat fuse panel
Ground Wire Installation
The right ground connection affects gage accuracy by a lot. The system needs multiple ground connections that work together. A complete grounding approach has:
Tank Grounding Requirements:
- Metal tanks need direct ground connection for safety
- Sender unit needs its own ground wire
- Ground bus connections in helm and bilge areas
Ground Wire Routing: Connect ground wires in this order:
- Sender unit ground to ground bus
- Tank body to negative battery terminal
- Gage ground to helm ground bus
- Engine harness ground to tachometer
The sender unit’s ground connection uses either:
- A dedicated tab on the outer ring
- One of the mounting screws
Critical Grounding Points:
- Check continuity between aft and helm ground busses
- Make sure helm bus and gage have solid connection
- Keep proper ground between sender and battery
The best performance comes from using 16-gage or larger ground wire through the wiring harness. All ground connections should stay free from:
- Corrosion
- Paint interference
- Loose terminals
- Environmental contamination
Testing Ground Integrity: Do these important checks:
- Measure resistance between ground points
- Check ground continuity at all connections
- Test voltage drop across ground circuits
- Make sure bonding wire is installed properly
Note that ground and bonding serve different purposes – ground completes the electrical circuit while bonding protects against static electricity through the engine zincs.
Common Grounding Issues:
- Corroded connections
- Insufficient wire gage
- Improper terminal crimping
- Missing ground paths
- Paint interference at connection points
Your fuel gage system will give reliable readings throughout your boating adventures when you set up proper power and ground connections. Regular checks and maintenance of these electrical pathways ensure accurate and dependable operation.
Wiring the Gage to Sender
Your boat’s fuel gage and sender unit need a proper signal wire connection that follows marine-grade standards. The right connections will give a reliable fuel reading throughout your boating experience.
Signal Wire Connection
Marine industry standards specify pink wire for connecting fuel sender units to gages. This color-coding system, 40+ years old, remains the accepted practice for recreational boats. The signal wire carries varying resistance values that translate fuel levels into gage readings.
Essential Connection Steps:
- Connect the pink signal wire from the sender to the “S” terminal on your gage
- Verify the sender’s insulated terminal connects through plastic housing
- Test wire continuity using a multimeter
- Clean bare copper wire ends really well
Your sender units work best within specific resistance ranges:
- Empty tank: 240 ohms
- Full tank: 0-90 ohms
Connection Verification: Set your multimeter to measure ohms. Test resistance between:
- Signal wire endpoints
- Sender unit terminals
- Gage connections
Crimping techniques work better than soldering for marine applications. The American Boat and Yacht Council (ABYC) states that “solder shall not be the sole means of mechanical connection in any circuit”. Mechanical crimping creates connections that resist:
- Cold joint formation
- Fatigue-related breaks
- Vibration damage
- Corrosion infiltration
Wire Protection Methods
Marine environments create unique challenges for electrical systems. Good wire protection will give a reliable system and prevent common failures.
Primary Protection Techniques:
- Apply heat-activated adhesive-lined tubing
- Use marine-grade crimping connectors
- Install self-draining wire looms
- Implement proper strain relief
Protection becomes vital when routing wires through bulkheads or structural members. Boatus recommends these measures:
- Route wires as high as possible
- Keep electrical connections away from compasses
- Use twisted pair conductors within three feet of sensitive electronics
- Apply waterproof sealants at penetration points
Wire Size Requirements: ABYC’s recommended minimum wire gages based on current draw:
- 16-AWG for lights and simple equipment
- 12-14 AWG for reduced voltage drop
- Larger gages for extended wire runs
Environmental Protection: Marine-grade tinned wire protects against:
- Salt water exposure
- UV radiation
- Engine compartment heat
- Mechanical stress
These methods provide ultimate connection protection:
- Use double-crimp ratcheting wire terminal crimpers
- Apply dielectric grease to connections
- Protect with liquid electrical tape
- Install proper strain relief at terminals
Testing Protocol: Check connection integrity through:
- Pull testing terminals (16 AWG should withstand 15 pounds of force)
- Resistance measurements across connections
- Visual inspection of heat shrink coverage
- Voltage drop testing under load
Note that wire problems usually happen at connections rather than along wire runs. Focus your protection efforts on terminal points and junction areas. On top of that, keep all conductors away from:
- Steering cables
- Engine shafts
- Control linkages
- Heat sources
These precise wiring techniques and protection methods will give you a fuel gage system that stays accurate and reliable throughout its service life. Regular inspection of these connections helps maintain your boat’s fuel monitoring system properly.
Testing Your Installation
Your newly wired boat fuel gage needs systematic testing to work reliably. Voltage checks and proper calibration will verify the accuracy of your installation work.
Original Power-Up Check
The testing begins with voltage checks at the gage terminals. A multimeter set to DC volts should connect the red lead to the “I” terminal (positive/ignition) and black lead to the “G” terminal (ground). The system should display at least 12 volts when functioning properly.
Everything in Power Tests:
- Verify voltage with key switch on
- Check accessory switch position
- Get into battery connections
- Test ground circuit integrity
The sender wire should disconnect from the “S” terminal for detailed testing. The gage should show empty after removal, that indicates infinite resistance to ground. You can create a direct path to ground by connecting the “S” terminal to the “G” terminal with a paperclip – this moves the needle from empty to full.
Calibration Steps
Tank design and sender type determine specific calibration procedures for modern fuel gages. Remove the sender from the tank and watch gage movement as you raise and lower the float arm. The gage response should be smooth, showing “full” as the float rises and “empty” when lowered.
Resistance Testing Protocol:
- Empty tank reading: 240 ohms
- Half-tank position: 109 ohms
- Full tank reading: 33 ohms
These critical components need precise calibration:
- Center terminal cleanliness
- Ground reference connections
- Electric capsule functionality
Used senders need their center terminal and ground reference points cleaned with a brass or stainless steel brush. Clean connections will give accurate readings without corrosion or debris interference.
Advanced Testing Methods:
- Connect DVM (Digital Volt Meter) to sender:
- Set to ohms measurement
- Attach leads to center stud
- Connect to ground reference
- Verify readings match specifications
- Check conversion capsule:
- Test leads independently
- Observe resistance changes
- Note full reading values
- Verify proper range limits
Blue Sea Systems equipment, to cite an instance, allows calibration through constant-rate tank filling and adapts to irregular tank shapes.
Troubleshooting Common Issues:
- Float saturation with fuel
- Bent or rusted float arms
- Flexing components
- Inaccurate readings
Flow meters or ultrasonic sensors are a great way to get accuracy, particularly in high-end power boats. These advanced systems provide precise fuel monitoring through:
- Programmed calibration
- Digital readouts
- Immediate consumption data
- Tank shape compensation
Note that sender units near aft sections might show increased readings while underway since fuel height rises in that area of the tank. This factor matters when verifying calibration accuracy during sea trials.
Common Wiring Problems
A quick diagnosis of three main areas will help you solve fuel gage wiring problems in your boat. You’ll need to get into these common failure points to fix fuel gage malfunctions fast.
Ground Issues
Bad grounding is the biggest problem behind fuel gage failures in boats. Your gage readings become erratic or completely wrong when ground connections go bad. The gage usually shows empty with a full tank when ground connections fail.
Common Ground-Related Problems:
- Corroded wire connections at gage terminals
- Bad ground paths between sender and battery
- Poor bonding between tank and vessel structure
- Loose or dirty ground connections
Set your multimeter to ohms and check resistance between the sender ground and battery ground. Good ground connections show almost zero resistance. Look at all ground connections for:
- White or green corrosion buildup
- Broken wire strands inside insulation
- Loose terminal connections
- Paint blocking contact points
Sender Unit Faults
Harsh conditions constantly affect fuel sender units and cause various problems. These units can stop working or give wrong readings due to several factors.
Primary Sender Issues:
- Fuel-soaked floats from long exposure
- Bent or rusty float arms that restrict movement
- Broken internal resistors
- Wrong sender type installation
The resistance ranges for modern sender units are:
- Empty tank: 232-252 ohms
- Full tank: 28-36 ohms (American version)
- Empty tank: 0-2 ohms
- Full tank: 171-192 ohms (European version)
You can spot sender problems by these signs:
- Gage needle stuck at full or empty
- Random needle movement
- Wrong readings despite known fuel levels
Gage Reading Errors
Multiple issues beyond simple wiring can cause gage reading problems. These errors often point to bigger system problems that need careful checking.
Typical Reading Problems:
- Stuck Readings:
- Shorted gages read full
- Power loss shows empty
- Loose connections cause jumpy readings
- System Behavior:
- Proper grounding makes gage spike to full
- Dead gages don’t move
- Sender problems cause floating readings
Test your system in this order:
- Check gage terminal voltage against battery voltage
- Make sure ground connections work
- Test sender wire continuity
- Check sender resistance values
Some problems only show up under specific conditions:
- After running for a while
- During certain weather
- After turning power on and off
Digital systems can show distinct patterns:
- Display segments that flash
- Numbers that jump around
- Screens that go completely dark
Most fuel gage wiring problems can be fixed with systematic testing and knowledge of these common issues. Multiple problems might exist at once, so check the entire system instead of focusing on single parts.
Conclusion
Knowing how to wire a fuel gage correctly is essential for every boat owner. Your boating safety and enjoyment depend on reliable fuel monitoring that comes from choosing the right components, following safety protocols, and using precise installation techniques.
The success of your fuel gage installation relies on three crucial elements: proper grounding, accurate sender unit installation, and a full system test. Marine-grade standards must apply to all connections. You’ll need appropriate wire protection and testing methods to ensure your system stays reliable.
Safety should be your top priority during installation. The right tools, proper documentation, and recommended precautions will protect you and your vessel. Your system needs regular checks and maintenance to spot potential risks before they turn into serious problems.
This detailed guide gives you the knowledge to handle your boat’s fuel gage wiring confidently. Make sure you verify all connections, check the grounding, and test the system extensively before you take your boat out on the water.